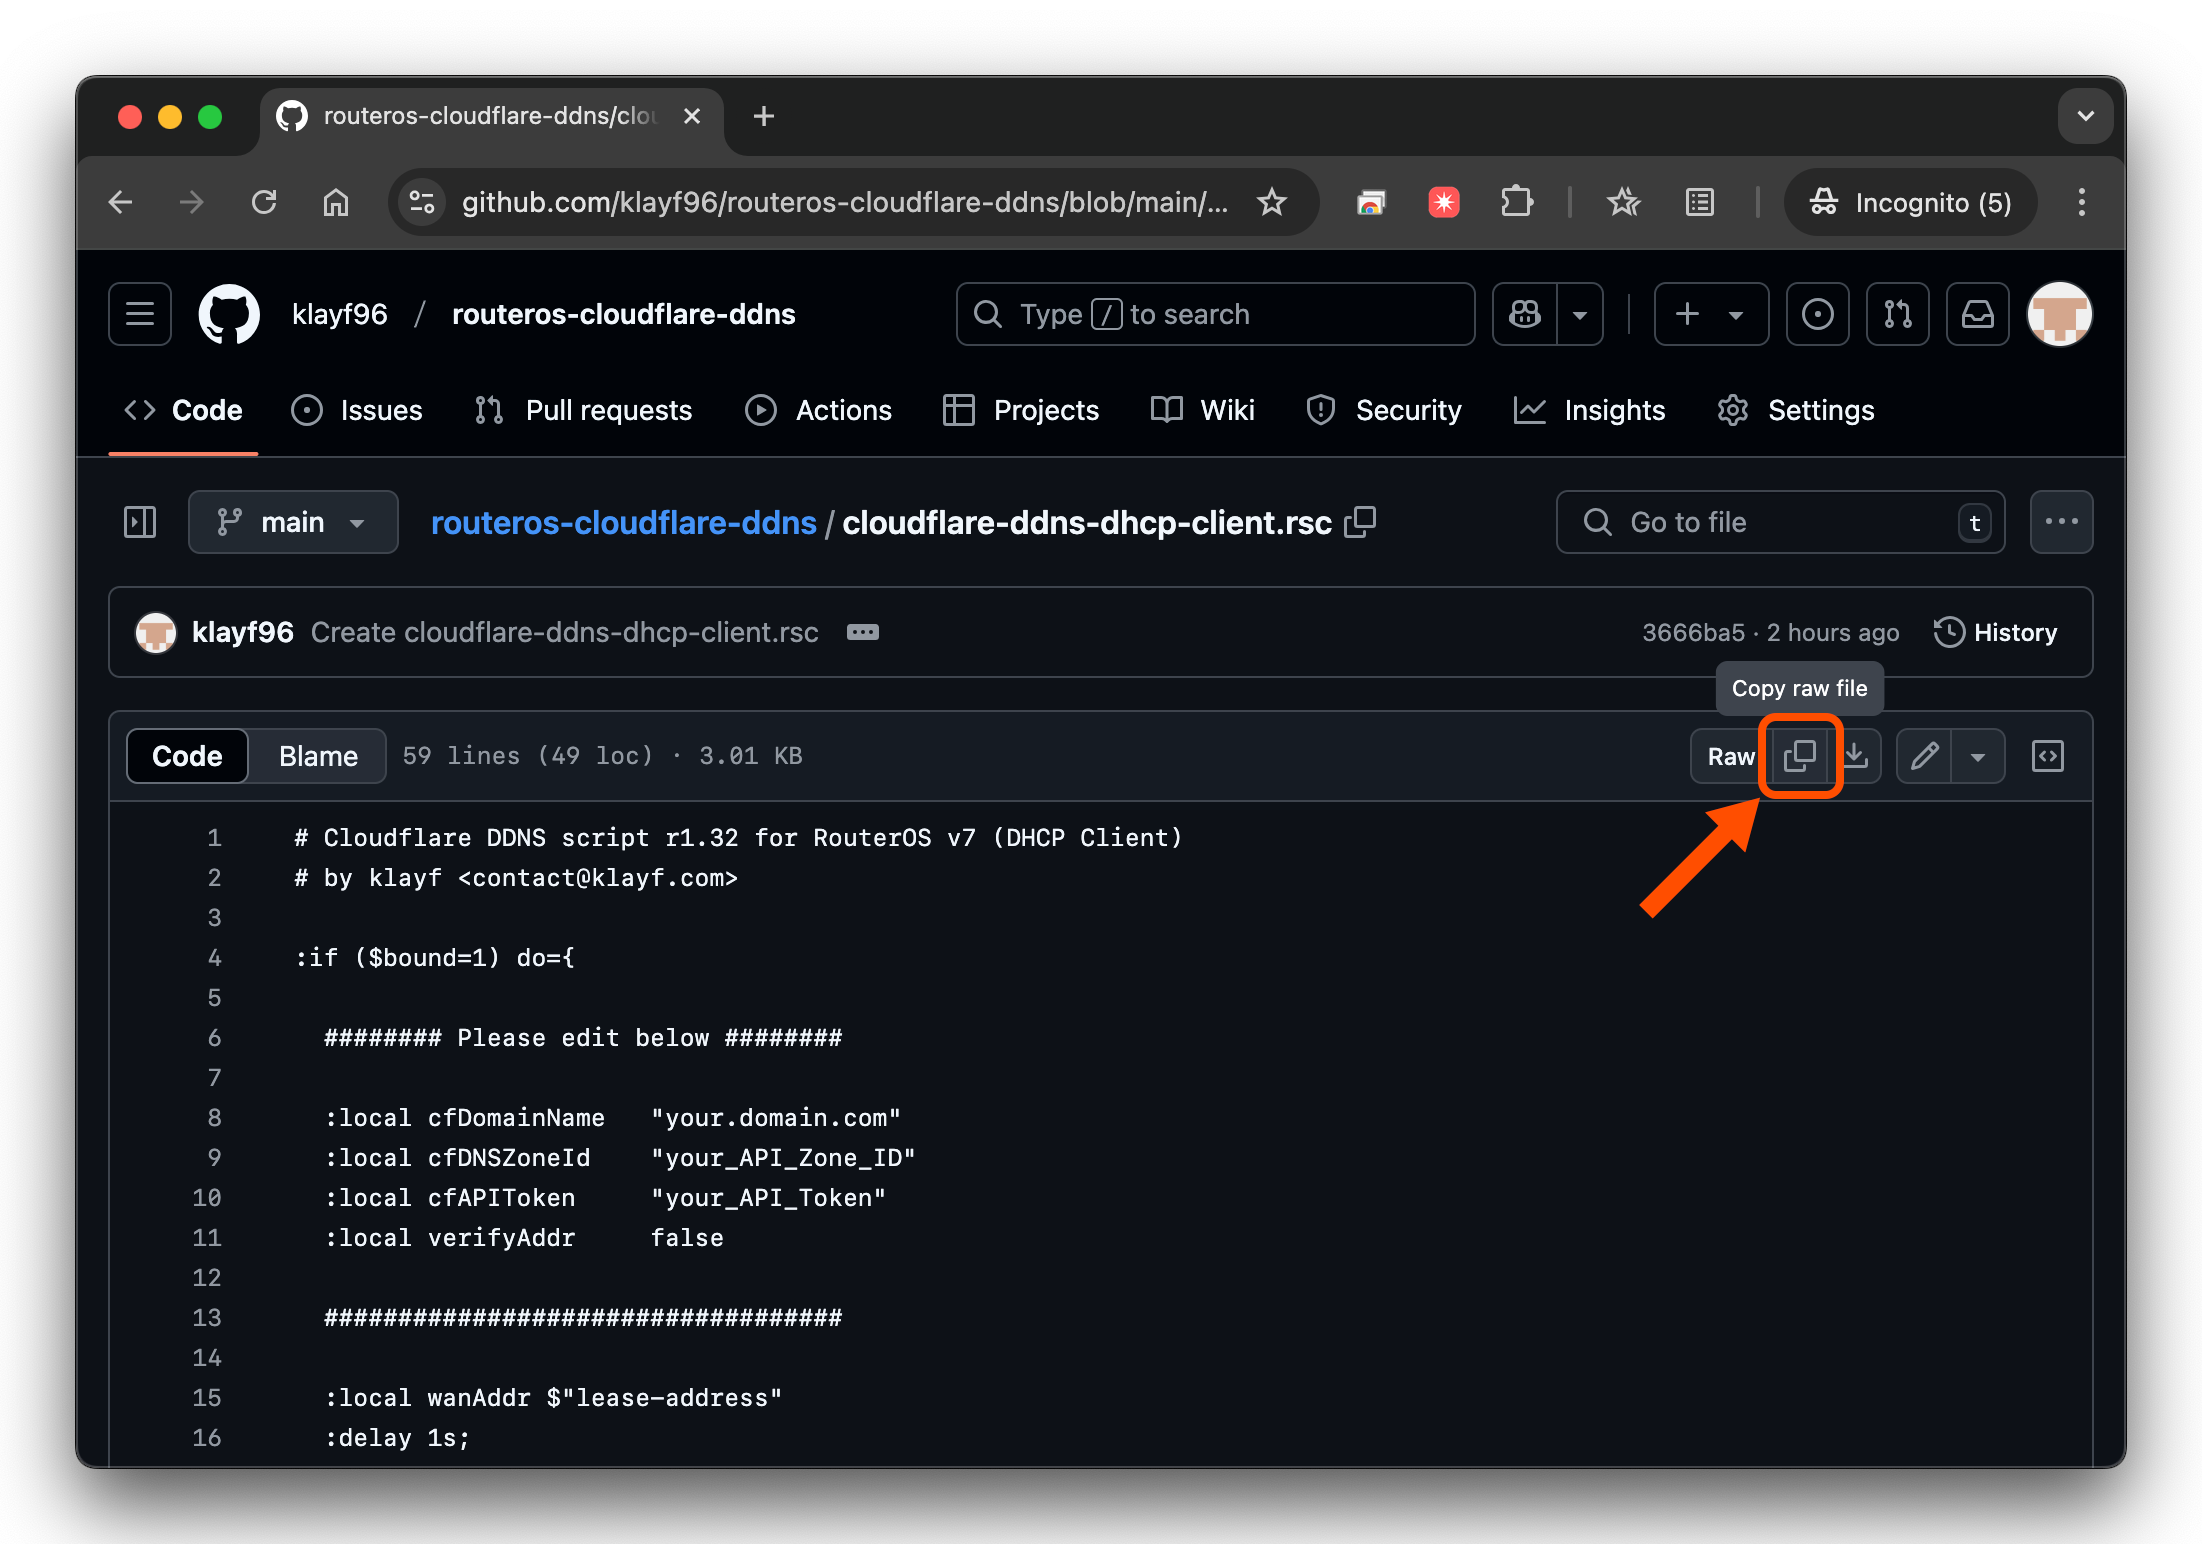
Cloudflare DDNS script for MikroTik RouterOS v7
- Efficient as it runs on DHCP Client level.
- Cloudflare DNS ID is automatically retrieved, and TTL and Proxied values are preserved as existing settings.
- Supports IPv4 addresses. (IPv6/SLAAC prefix delegated addresses are not supported yet)
- It consists of simple code, so it runs smoothly even on low-end devices. (Tested on hAP ac lite)
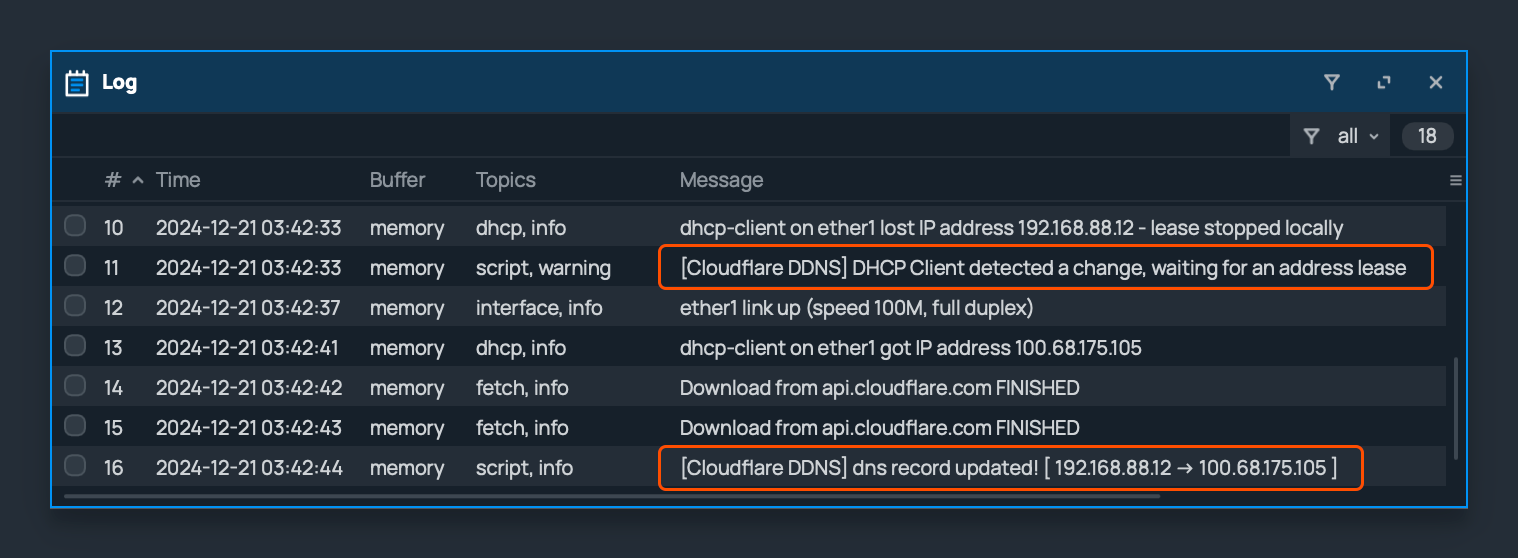
- Written for RouterOS v7, no external parsing script is required.
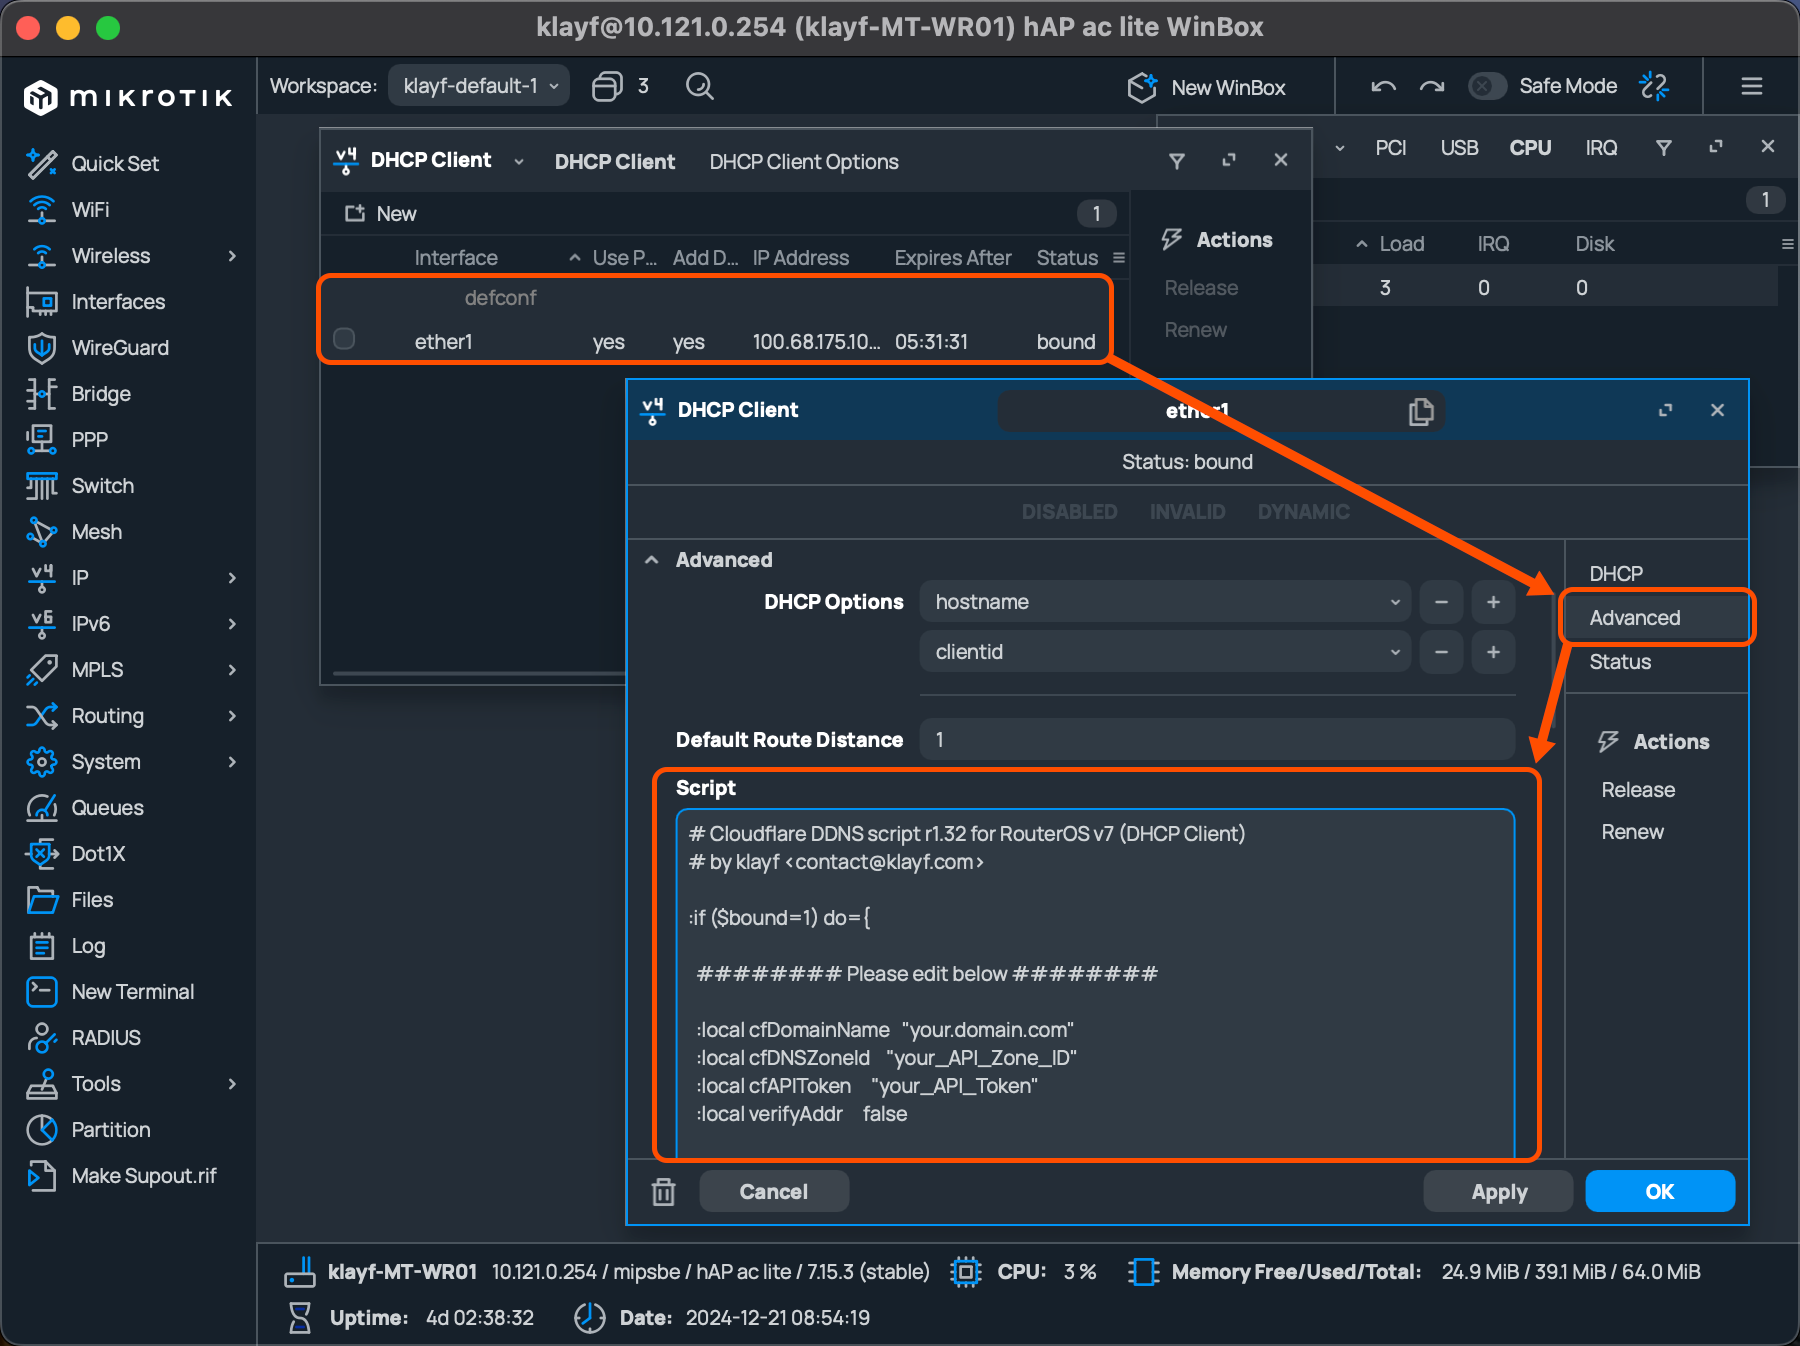
- Domain(DNS Record name) to which DDNS will be applied (e.g. nas.example.com)
- The target domain or subdomain must already be created in Cloudflare DNS Record.
- DNS Zone ID of Cloudflare account (Displayed at the bottom right of your Cloudflare Dashboard)
- API token of Cloudflare account (It can be created from the bottom right of the Cloudflare Dashboard)
- Please see the following link: https://developers.cloudflare.com/fundamentals/api/get-started/create-token/
- Global API key is the previous authentication method, and Cloudflare recommends using API Token. Therefore, the public version of this script has removed the logic related to Global API key.
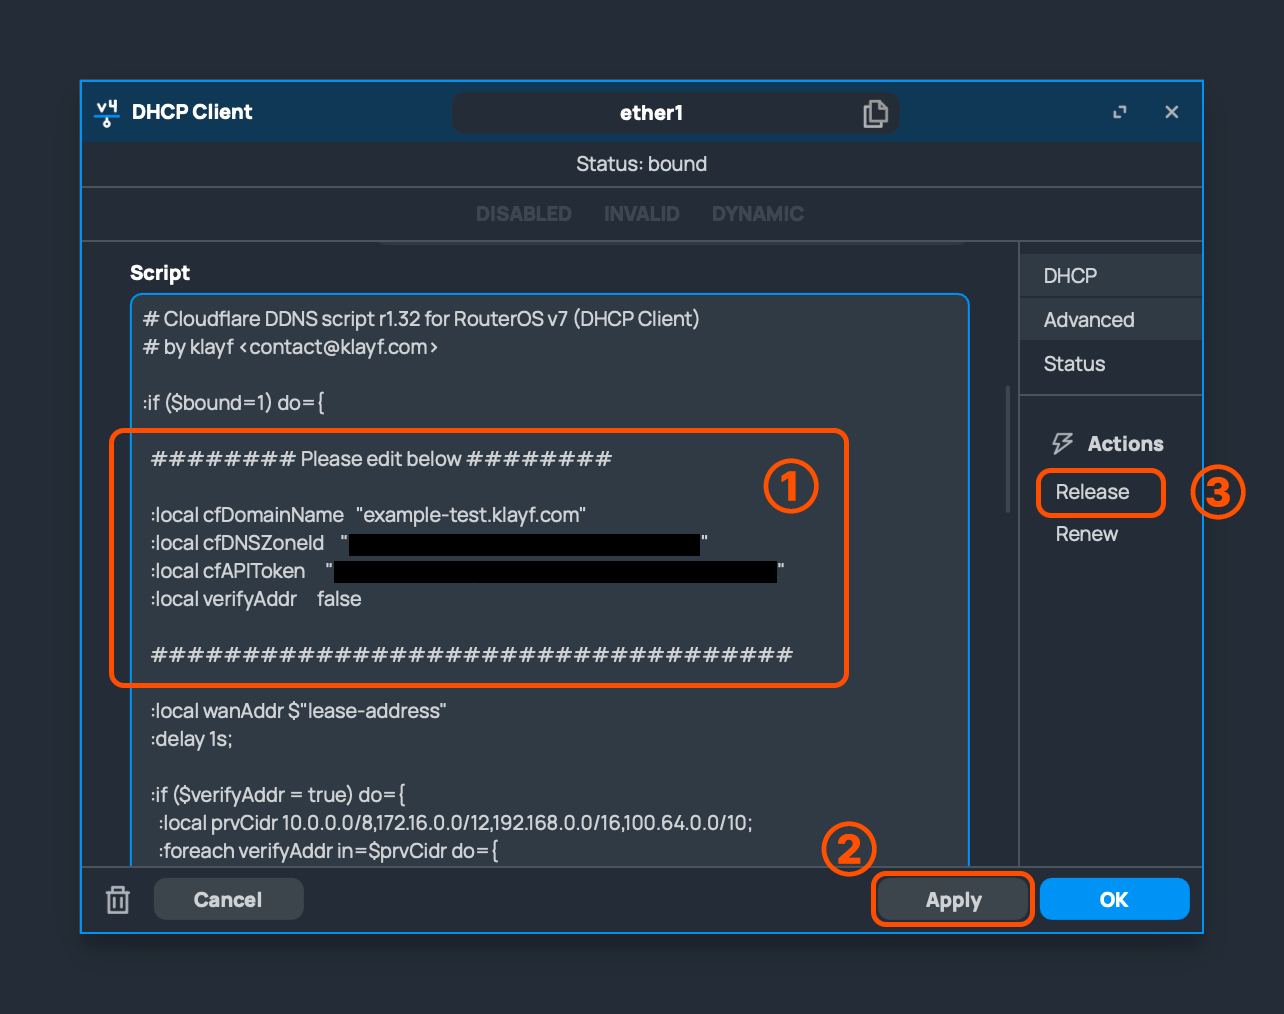
- If this value is set to true, it verifies whether the leased address is a Public Address.
- If the router leased a Private Address, it queries AWS checkip to register the actual address. (This can be helpful in CGNAT environments)
- This logic is not helpful in a double NAT environment, because the current router is not the actual leaser, so it cannot detect the address change. (In a double NAT environment, use a scheduler script for periodic updates.)
- IPv4 Address : Click [IP] - [DHCP Client]

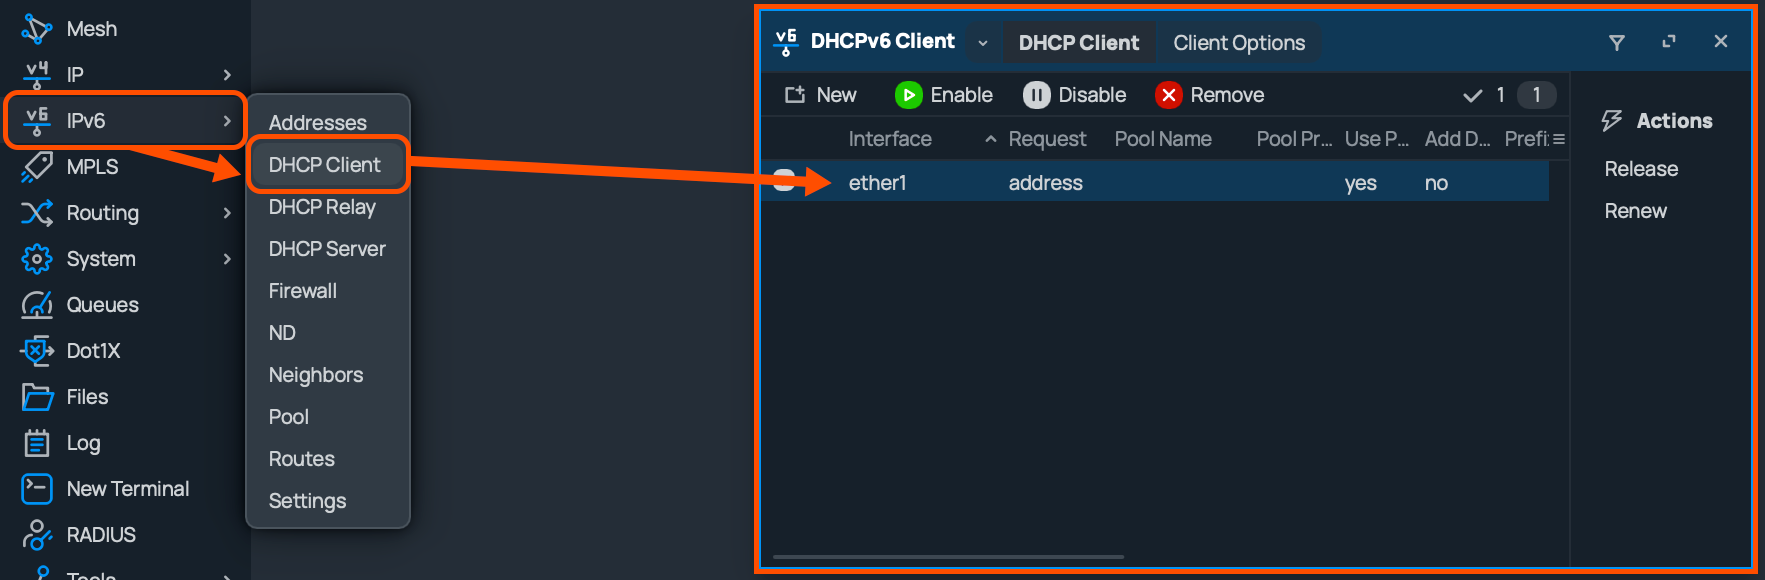
IPv6 Address : Click [IPv6] - [DHCP Client](Not supported yet)
3. Open the properties of the currently active DHCP Client, click the [Advance] tab and paste the script into the [Script] entry.